The LightWave Layout Interface
LightWave’s
Layout has been designed to provide the most efficient interface possible
for your 3-D animation work. By default, there is a single large viewport,
but you can display multiple viewports if you desire. A viewport provides
you with visual feedback about the virtual world you are creating. How
well this corresponds to what the final output will look like is completely
configurable by the user. This can range from bounding box stand-ins to
wireframe representations, all the way to textured and solid-shaded displays.
How you view your creations will vary depending on their complexity, your
machine’s capabilities, and other factors.

1. Top Tool Bar, 2. Main Tool Bar, 3. Menu Tabs, 4. Modeler Access, 5.Workspace,
6. Numeric Adjustment Controls, 7. Grid Display, 8. Selection Info, 9.
Current Item and Item Properties, 10. Tool Tips, 11. Time Line and Dope
Track, 12. Keyframe options, 13. Undo/Redo, 14. Preview Controls.
1
and 2. ToolBar
The toolbar sits at the side of the screen. The buttons presented will
vary depending on which menu tab you select along the top. The Top Tool
Bar buttons will appear no matter which Tab is selected. You can completely
hide (or unhide) the toolbar by pressing Alt+F2.
2.Layout
Menus
The Menu Tabs located at the top of the interface will determine which
tools appear in the Tool Bar. Generally, menu group names that are verbs
contain commands based on the type of action they perform. Menu group
names that are nouns contain commands based on the type of object they
affect. The menu tab names are all intended to be read as verbs.

Items-
Add objects, lights, and other items to your scene here.
Modify- Move, Rotate, Scale, and more.
Setup- Bone tools and other rigging tools.
Utilities- Lscript and Plug-ins Access.
Render- Render Options, VIPER access and more.
View- Display options and selection tools can be found here.
4. Modeler Access
This command will switch to your Modeler window if it is open or opens Modeler if you do not already have it open.

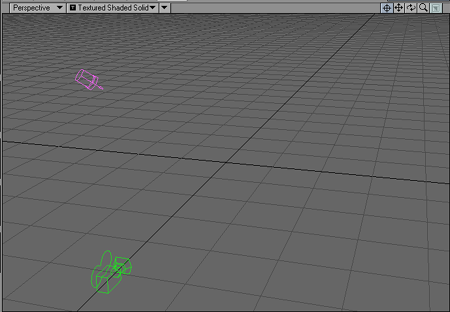
5. Workspace
The Workspace consists of Viewports. By default, there is a single large viewport, but you can display multiple viewports if you desire. A viewport provides you with visual feedback about the virtual world you are creating.
Viewport Titlebar
You can change the View Type and Rendering Style of a viewport without going to the Display Options panel by using the pop-up menus on the left side of each viewport titlebar. You can also activate Weight Shade and Bone X-ray modes.

The buttons
on the right side affect centering, panning, rotating, zooming, and minimizing/maximizing
your view.

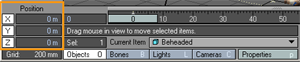
6. Numeric Adjustment Controls
You can change position and rotation settings numerically by entering the desired values in the XYZ or HPB fields, located in the lower left corner. The function of these fields change depending on the editing being done.
Protecting from Changes
Whether you are moving, rotating, or stretching an item, or moving its pivot point, Layout lets you independently deactivate any of the three components used for those settings. You deactivate the components on the information display in the lower-left corner of the screen. This protects the deactivated component(s) from changing as you move your mouse.
Note: You can also confine changes by
using any of the orthogonal views (i.e., Front, Top, and Side). In these
views, you can generally make changes only along the display’s horizontal
and vertical axes using your mouse.
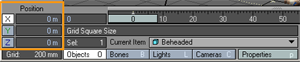
7. Grid Display
A grid of squares—cleverly known as the grid —is visible in any of the orthogonal views, as well as the Perspective view. The grid serves as a visual reference when you move items around, but it will never render in a final image (no matter how much you wish it to). The grid lines are darker every tenth square for visual reference. The Origin is located at the center of the grid.
You can find the current size of the grid squares in the information field at the very lower-left corner of the screen. The size of each grid square is adjustable as is its overall size on the Display Options tab of the Preferences panel (Edit >Display Options).
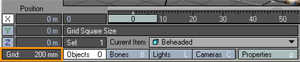
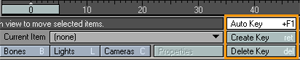
8. Selection Info
The Selection Info displays how many items are selected.
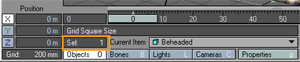
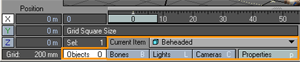
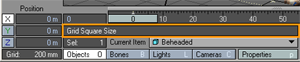
9. Current Item and Item Properties
Usually, you work on one item at a time, the current item, and you need to tell LightWave which item it is. But before you learn how to do that, you need to know that Layout items are grouped into four different types: objects, bones, lights, and cameras. When you work on any item, the edit mode buttons along the bottom (i.e., Objects, Bones, Lights or Cameras) are set to the current item’s type.
Once you select the Current Item, click the Properties button to view the items properties based on the Edit Mode.
10. Tool Tips
Displays helpful information for current tool.
11. Time Line and Dope Track
The Timeline, located beneath the viewport area uses the Frame Slider which can be dragged to change the current frame or shuttle through your scene. The input field to the left of the timeline is the first frame in your scene and the input field to the right is the last frame. You can change these settings by simply changing the values in either field.
The DopeTrack allows you to play with keys. Not only their position in time and the scene, but also to alter their properties. You can set up markers here to tell you when things should happen in the scene and bake ranges of keys to make your animation concrete.

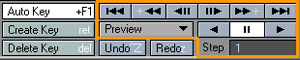
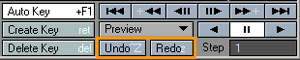
12. Keyframe options
To automatically create or modify keys you must activate the Auto Key option on the main interface. This is the global on/off switch for automatically creating keyframes. It works in conjunction with the Auto Key Create setting (General Options tab of the Preferences panel).
Use the Create Key and Delete Key commands to add and remove keyframes.
13. Undo/Redo
The undo function will undo motion changes (Move, Rotate, Size, or Stretch tool). The button description will change, letting you know what will be undone (e.g., Undo Move) or redone (e.g., Redo Rotate).
HINT: If you are not using the Auto Key
feature, you can quickly reset all aspects of a frame (i.e., position,
rotation, etc.) if you haven’t created the key yet. Just press the RIGHT
ARROW key and then the LEFT ARROW key. This advances the current frame
and then goes back to the original frame. The frame will return to the
last keyframed state, or if the frame is not a keyframe, to its in-between
state.
14. Preview Controls.
Besides dragging the frame slider to navigate through your scene, you can also use the transport controls. In addition to playing a scene using the transport controls, you can also create special preview animations. In most cases, these will give you a more accurate preview of your final animation.