
Translate Plus Tool
Translate
plus (Modify > Translate:
More)
functions as a detailed Move, Rotate,
and Scale
tool. You can use a point's normal, a segment, or a segment's normal to
define how to move, rotate, scale a selection. You can even just use global
X, Y, or Z. Each of these operations can also be done with a falloff.
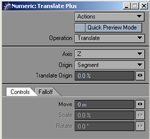
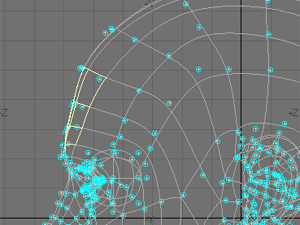
Quick Preview Mode- The Quick Preview
Mode will show a blue temp outline of the translation and the action won’t
take place until you have applied (Enter key) the action. This is particularly
handy when working with very heavy meshes.
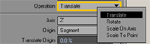
Operation-
This setting defines what will be preformed on the object. Options are:
Translate,
Rotate,
Scale on Axis,
Scale to Point.
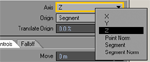
Axis-
This defines which axis will be used to determine how the selection is
“Operated” on. X, Y, and Z are just the default axes. The other options
are Point Normal, Segment,
and Segment Normal.
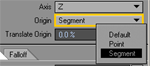
Origin
– Refers to where the Axis originates.
By default it is placed at center of whatever the Axis
is. There are times when it needs to be somewhere else. Generally, there
won't be a need to change this unless the operation is Scale on Axis.
The options are Default, Point,
or Segment.
When Point
and Segment are selected the object will display blue circles over each
point. Select one point for Point mode and select two points for Segment
mode.
Translate Origin – Enables moving of the Origin. For example, if Point Normal was the axis chosen, it will move the Origin along the normal.
“Controls” Tab – Whichever Operation is selected will be editable and the others will be grayed out. Generally, there is no need to use the controls because it is easier to click on the screen itself to move selections.
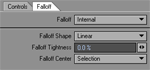
“Falloff” Tab – There are options for
falloff, Internal and None. Internal
means that the falloff is only within the selection. Falloff settings can be edited by using the options
at the bottom of the panel.
Falloff Shape – Defaults to Linear, but there are also Bell, Curve Down, and Curve Up. Using Falloff Tightness can modify the shape further.
Falloff Tightness – Determines whether points in falloff range will be closer to selection (or origin) or closer to their original position.
Falloff Center – Same as the Origin settings except instead of Default it is a Selection.
Even though holding “ctrl” or using Middle Mouse Button will constrain movement, sometimes that is hard to do in perspective. Also, if moving selections with LightWave’s Move tool is slow (due to large poly count) this tool is handy because it moves in real time.
