
VIPER
Viper stands for Versatile Interactive Preview Render and is a good way to speed up finalising your scene. It can preview volumetric lights, Sky Tracer, HyperVoxels and surfaces.
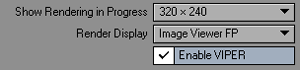
In the render
options window, or the Render Tab menu, you can enable VIPER by clicking
on the so-named button. Be sure to turn it off when you are ready for
your final render since it takes memory and processor time, slowing down
your renders.

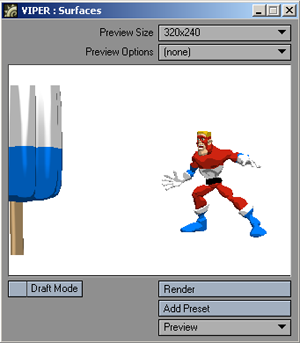
Surface Preview Mode
For surface previews Viper needs to have a data buffer to work on so you
will need to render an image for it to work with. Before you hit F9, make
sure you have Enable VIPER turned on in Render Options or the button in
the Render tab!
Once your render has finished you can open the Viper window by hitting F7. When you do, hit the Render button and you will see your image take shape in front of you. If you don't have a fast machine, often a Draft Mode render (at half resolution) is often enough for you to get what you want and you can always check with a full-res render as and when needed. You can also change the size of the Viper window to get more detail, but be aware that such a change requires a new F9 render to take effect.
When LightWave
renders an image, it generates much more information than the red, green,
and blue components of the pixels you see in your images. The colour components
represent only a small fraction of the data that is generated during a
render. LightWave also generates, alpha (transparency), z-buffer (depth),
luminosity, diffuse, specular, mirror, shading, shadow, geometry, object,
diffuse shading, specular shading, and even custom surface buffers.
As a result, VIPER can determine not only what colour a pixel is, but also how far back on the z-axis a pixel is, what surface it relates to, and so on. By manipulating this extra data, VIPER can change a surface colour or specularity setting and show the result amongst the rest of the scene without requiring another full frame render. This will even show the appropriate shading, scene lighting changes, as well as backdrop colour changes.
To select a surface in the Viper window, you can click on the part of the image containing the surface you wish to edit.
Since VIPER does not do a full-scene evaluation, there are some things that are not accounted for, like vertex maps (weight, UV, etc.) on SubPatch objects, ray-traced effects (reflections, refractions, shadows), shadow maps, fog, double-sided polygons, radiosity, light falloff, and so on. As such, it is not a replacement for an F9 render. Also, VIPER will not be affected by moving geometry.
Other
Preview modes
Viper can be used to preview HyperVoxels, SkyTracer skies and volumetric
lights. In all of these cases full-scene evaluation is not required, so
you don't need to perform a render before you can use Viper.
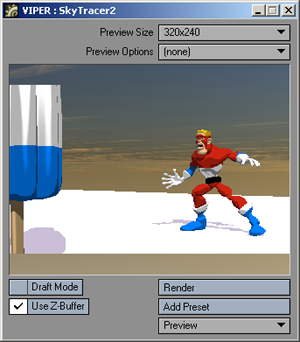
If you render your scene first you can
preview SkyTracer in Viper with the foreground scene elements.
There are two drop-down menus that need to be explained at the top of the window. There's Preview Size, which dictates the size of your Viper window and Preview Options. Preview Size allows you to dictate what sort of preview you want to work with. Be aware that in Surface Preview mode you cannot change the Preview Size without doing another render.
Preview
Options
This drop-down will only display the option (none) when you are using VIPER
in Surface, Volumetrics or SkyTracer modes. If you would like to see some
stuff going on in this menu, try adding some HyperVoxels to your scene
and then use Viper. Then you will see that the Preview Options drop-down
menu has three options – Object, Scene and Particle. The difference is
as follows:
Object Preview
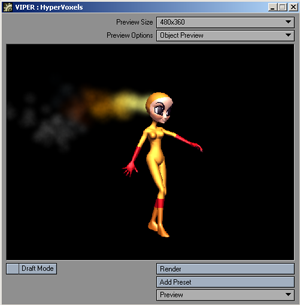
This will
show the object you have HyperVoxels attached to. If, for instance, you
have an emitter selected, the object preview will show the whole stream
of particles coming from it. The active object is selected in the HyperVoxels
window.
Scene Preview
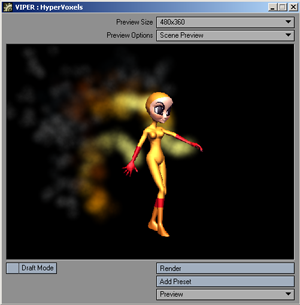
The scene preview will show all HyperVoxel
objects that are visible from the camera view. If you have three emitters
this mode will show all three at once, rather than just the active one.
Particle Preview
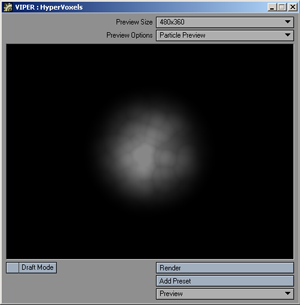
This mode shows a close-up of a single
particle, very handy in the case of an emitted particle so that you can
see it in detail.
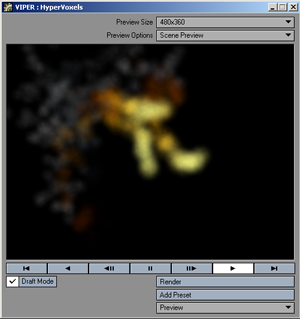
Animated
Preview
When previewing HyperVoxels, skies or volumetric lights, a very powerful
feature of Viper is the ability to make a preview over time. If you click
on the Make Preview button you can make an animation that can be played
back within the Viper window.
Note: For
any of the Viper modes, you can add a new preset to the current presets
window (F8). This allows you to keep a library of useful settings for
particles, skies or volumetric lighting types.
Note: If you have more than one object type in a scene – for instance, a fountain spraying water into an afternoon sky under the watchful eye of a streetlamp – and you want to be able to preview them all in Viper, clicking on the interface for each object type – Surface Editor for the fountain, HyperVoxels for the water, SkyTracer for the sky and Volumetric Options for the street lamp – will switch Viper to the appropriate mode.
